If you want to share or save an image of what is on your MacBook or Mac Pro, then you need to take a screenshot. Here’s how to take a screenshot on Mac.
Take Full Desktop Screenshot On Mac
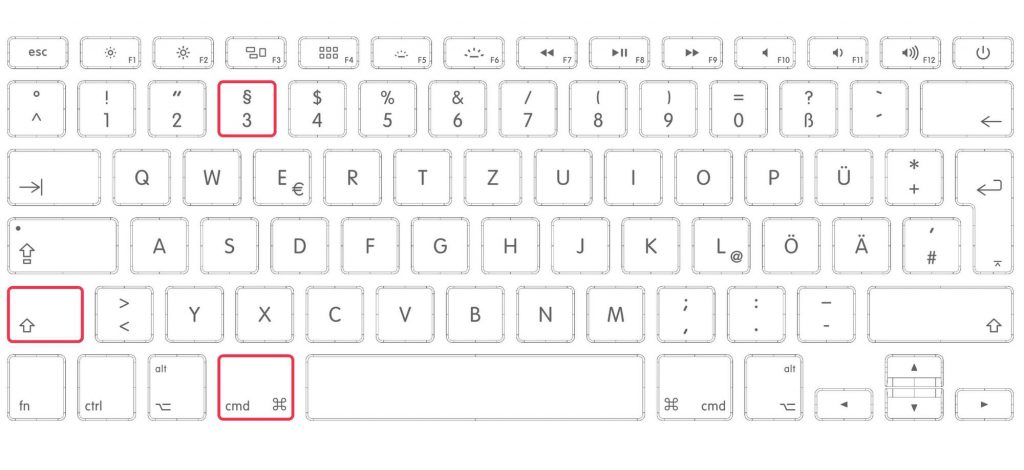
This will capture everything on your Mac screen. Press and hold the Shift, Command, and 3 buttons on the keyboard.

You’ll see a thumbnail in the corner of your screen. The screenshot will then be saved as an image to your desktop.
Screenshot a Section on Mac
Instead of capturing the entire Mac desktop and then editing later, you can capture only the section of the screen you’re interested in.
Press and hold Shift, Command and 4 buttons on your keyboard together. The mouse cursor will turn into a cross hair icon. Use the mouse or track pad to select the area you want to capture.
Once you release, the screenshot will be saved to your desktop.
You can move the selected area by dragging it with your mouse while holding down the Space Bar.
How To Screenshot a Window On Mac
When you want to take a screenshot of a entire Window on your Mac, press and hold the Shift, Command, 4, and Space bar buttons on the keyboard.
The cursor will change into a camera icon.
Click the menu bar of the window you want to screenshot and then the screenshot will be saved on your desktop.
Tip: Watch Apple’s Video

